Part 4 - Gliding
Most of my ski days on Cascade high routes have fallen between the 4th week
of May and the 4th week of June. This is the period of maximum
consolidation before the snowpack becomes too patchy for continuous skiing
above timberline.
As Consolidation Continues ...
- You can travel more freely throughout the day on south slopes, north
slopes, or just about any slopes.
- Trail breaking becomes a non-issue, and the snow becomes firm enough
that you can glide efficiently.
- These are ideal conditions for long, multi-day trips and what I call
“flow days,” dawn-to-dusk day-trips on skis where you travel
light and fast.
- As summer conditions develop, the snow eventually becomes too hard
for skinning and too patchy for continuous skiing. For me, carrying skis
is not what skiing high routes is about, so I hang them up and move on to
other activities.
- Mt Baker typically offers the longest season.
Late Season Trips
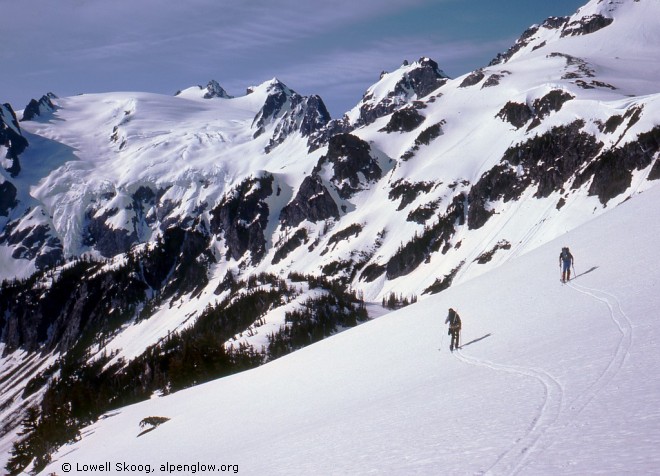
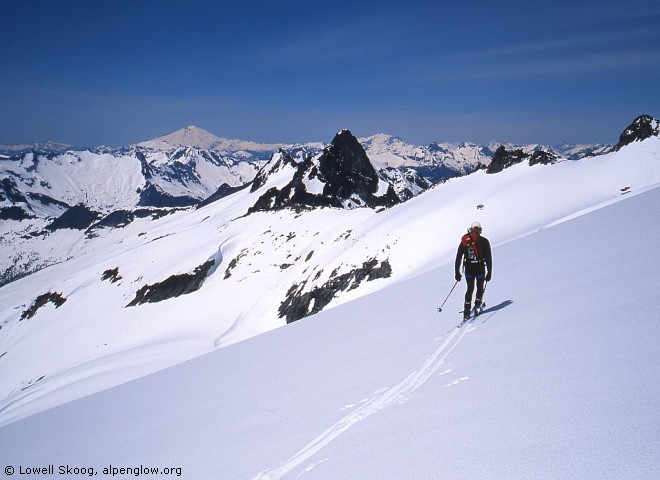
- One of the classic late-spring trips is the Ptarmigan Traverse,
shown in the opening photo (above) on this page. I’ve skied the
Ptarmigan three times, starting with my first trip in 1982.
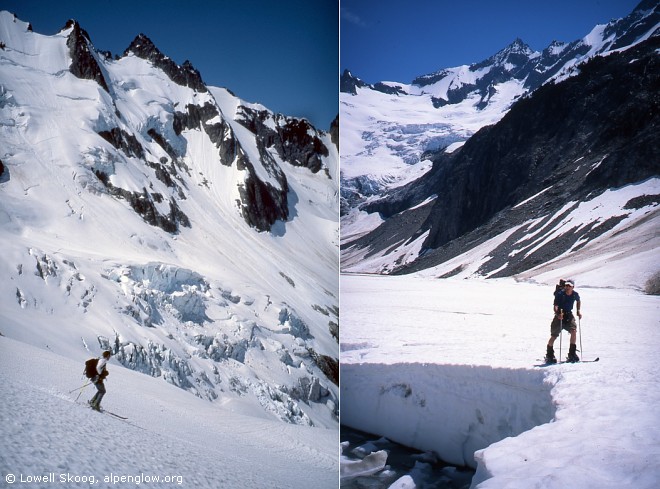
- In 2002 the snowpack lasted long enough to ski the Forbidden Tour on
the summer solstice (June 22, pictured below). This was a 16-hour
flow-day that culminated with a ski ascent and descent of Eldorado Peak.
|
 |
|
Skiing the Forbidden Tour on a "flow day" in June 2002.
Left: Andreas Schmidt skis the Forbidden Glacier.
Right: Sean Courage crosses Moraine Lake.
|
 |
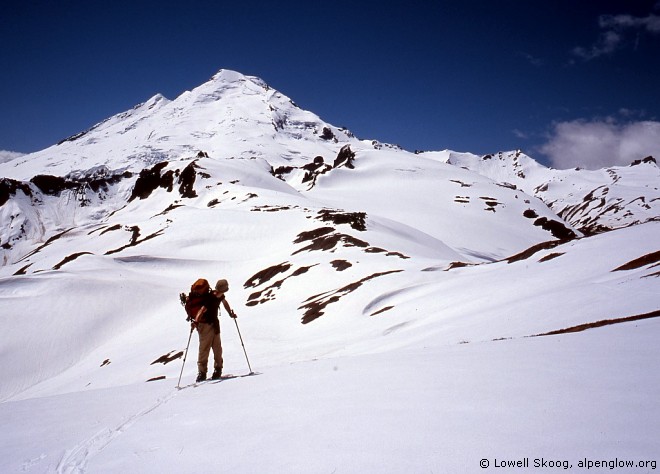
- During the spring of 2008 several friends and I did a wonderful
one-day orbit of Mt Baker (pictured below). We skinned up the Coleman
Glacier and circled to the top of Sherman Peak, then completed the entire
spiraling route around the east and north sides of the mountain without
ever putting our skins back on.
- These are the sort of trips you can do when the days are long and
the snow is reasonably consolidated.
|
|
|
David Perez approaches the Mazama-Roosevelt saddle
on the high-level orbit of Mt Baker, June 2008.
|
|
Making Terrain Work For You
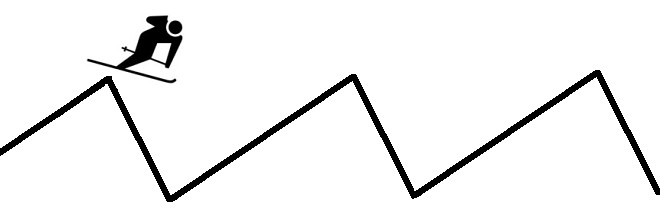
- The sketch below is a crude representation of a mountain
range.
- Its purpose is to emphasize that mountains are often not
symmetrical.
- They have gentler sides and steeper sides.
- When skiing a high route, you have a choice of which direction to go.
- If you think like a downhill skier, you’ll probably choose the
hard way.
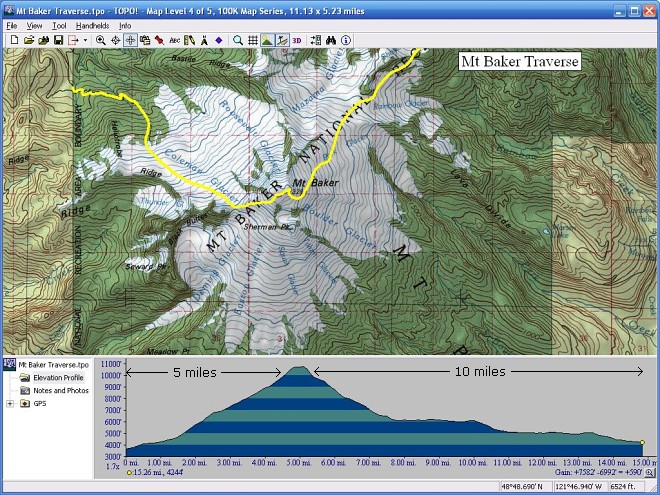
Exhibit A: Mt Baker Traverse
- In 1990, I traversed Mt Baker from east to west with my younger
brother Carl (photo below). We spent a day and a half approaching the
summit from the Mt Baker ski area and capped off the trip with a descent
of the Coleman Glacier route.
- This was a wonderful trip and a few years later I decided to try it
as a day-trip with Bruce Goodson. As we reached the summit after 12 long
hours of skinning, I realized that Bruce and I had gone in the wrong
direction.

|
|
|
The author approaches Epley Portal during a two-day, east-to-west
traverse of Mt Baker in June 1990.
|
|
- Here’s why: Before computerized tools like TOPO! became
available, it was more difficult to picture a terrain profile like the
one shown in the following diagram.
- The downhill skier in me looks at this profile and says, “Gee,
that consistent slope on the left looks like a great ski run.”
- But the weary traveler in me says, “If I descend the slope on
the right, I’m going to have gravity working for me, more or less,
for 10 miles, while if I descend the slope on the left gravity’s
helping me for only 5 miles. I should go from left to right, in other
words, from west to east.”
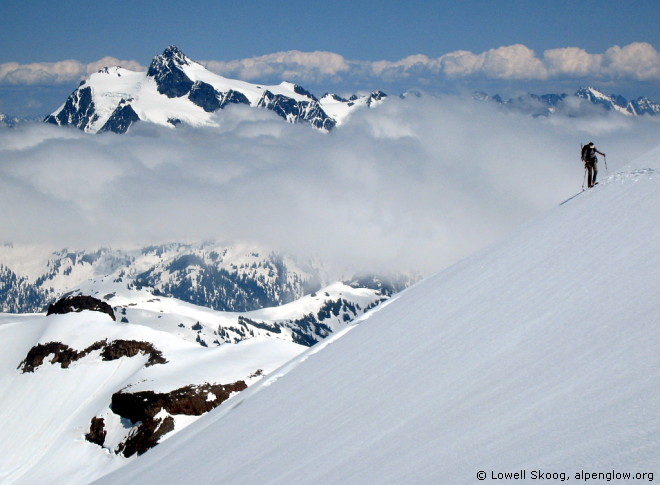
- So in 2004, I tried it that way and it made a huge difference. John
Mauro and I cut my previous one-day traverse time by almost a third and
enjoyed ourselves a lot more.
- We made it all the way from the summit of Mt Baker to our second car
at the ski area without putting our skins on (photo below).
|
|
|
John Mauro traverses from Epley Portal to Coleman Basin during
a one-day, west-to-east traverse of Mt Baker in June 2004.
|
|
Exhibit B: Backbone Ridge
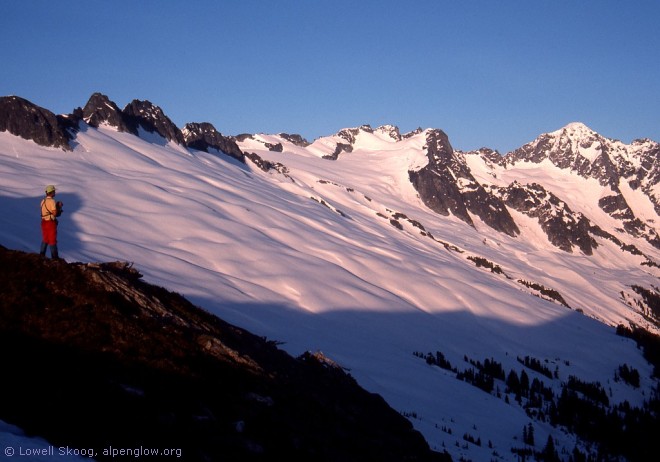
- In 1990, my brother Carl and I traversed Backbone Ridge from Little
Devil Peak to Eldorado Peak over three days. Below is a photo of our
first campsite with the beautiful SW slope of Backbone Ridge just
beckoning to be skied.
- We envisioned skiing Eldorado as the climax of the trip (and it was)
but later I realized that the long, gradual ascent of Backbone Ridge from
west to east had been a lot of work.
|
|
|
Carl Skoog admires Backbone Ridge and Eldorado Peak
from a camp below The Coccyx, June 1990.
|
|
- The profile below shows it clearly. I’ve limited the profile
to show just the terrain above 5000ft, so there’s no question about
which direction has more climbing in the alpine zone.
- The vertical gain is the same in either direction but the key factor
is how many miles the climbing is spread across.
- In this case, going east to west is much more efficient on skis,
because you can glide or stride without skins for a much greater
distance.
- In 2000, my older brother Gordy, Garth Ferber and I took advantage
of this to make a one-day traverse of the same route, going east to west.
- The photo below shows Gordy beginning the long glide from Early
Morning Spire to The Coccyx, way out at the end of the ridge toward
Mt Baker. Again, our travel direction made all the difference.
|
|
|
Gordy Skoog glides toward Backbone Ridge from the saddle next
to Early Morning Spire, June 2000.
|
|
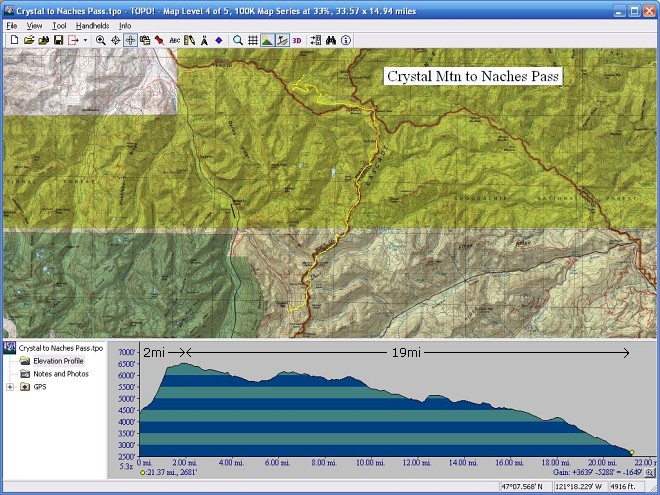
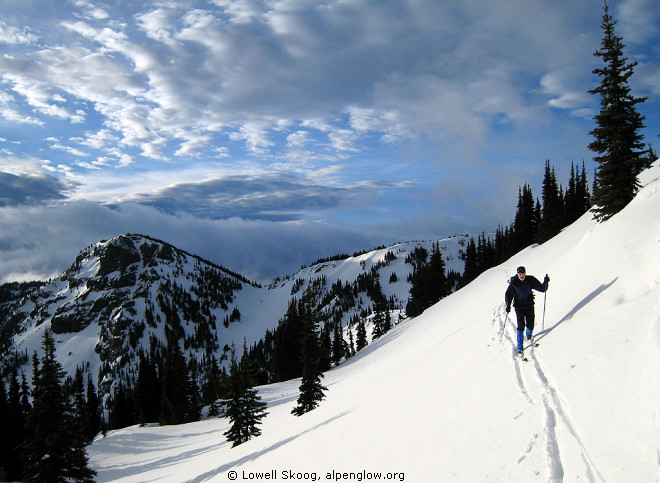
Exhibit C: Crystal Mountain to Naches Pass
- After learning this lesson the hard way several times, I finally got
it right on the first try during a trip in 2007. Pictured below is Paul
Ekman traversing from Crystal Mountain to Naches Pass in a single day in
March of that year.
|
|
|
Paul Ekman traverses Lake Basin on the Crystal Mountain to
Naches Pass Traverse, March 2007.
|
|
- As you can see from profile below, there’s no question about
which is the easier way to go.
- Not only do you start higher at Crystal Mountain, but you get the
climbing over with very quickly, which is actually more important on
skis. So most of the time you can take advantage of gravity and avoid
traveling with skins on.
- Certainly, not every route presents such a clear difference between
traveling one direction and traveling the other, but I’ve learned
to always plot the profile and look hard at it.
Estimating Trip Length
- Years ago I cooked up a really simple-minded formula with the
following structure:
A * miles + B * climbing = Total days
- Based on trips I had done, I filled in the constants using a little
algebra and fudging:
Miles/24 + FtGain/6000 = Days
- For example, 8 miles and 4000ft of climbing are equivalent to one
day in this formula.
- The formula seems to work best for 3 to 5-day trips with good travel
conditions.
- It tends to be generous for shorter trips and aggressive for longer
trips.
- The constants are based on my experience so you’ll probably
want to tweak them. There are much more accurate systems out there, but
this one gives you a quick and dirty first guess, and it has worked
pretty well for me.
<<Prev
|
Intro
|
Timing
|
Winter
|
Mush
|
Gliding
|
Weather
|
Glaciers
|
Next>>
|